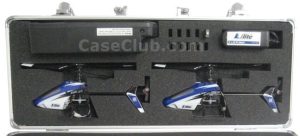
 We offer the easiest method in the industry to create custom foam inserts. Simply trace your parts. That’s it! Different people have different methods when tracing. Some people choose to tape computer paper together. Other people will trace on cardboard which they have lying around. And some people have large sheets of paper or poster board they use. Whatever you decide to use as your method one thing is for sure, it will be fine. You see… when creating custom foam inserts the idea is not to make our job easy, but instead make your life easy. If you can trace it and get it to us in one piece then we can cut a custom foam insert for you. Our accuracy when cutting custom foam inserts is so great that we can cut exactly on your traced lines. In fact so precisely if you trace with a thick marker you’ll want to specify whether we’re cutting on the inside or outside of the line. So now that you’ve decided to trace your parts what next?
Steps for Tracing your Parts for a Custom Foam Insert
Step 1: Decide on your canvas. Here are some helpful hints. If you already have a case use parts of the box it came in (the box should be larger than the surface area you need since the case came in it). If you have a printer, tape pieces of paper together. If you have poster board hidden away from a previous class or project use that. And of course for the most precise of individuals going down to a local Kinko’s store or similar can produce large sheets of paper.
Step 2: Layout your parts. Custom foam inserts look the best and of course function the best when laid out correctly. We recommend having at least 1.00″ foam cushion around the border and about 0.75″ between each part. There are always exceptions for example if your parts are really small this won’t apply.
Step 3: Trace your parts. And the fun begins… This step is the most important step of them all when it comes to custom foam inserts. We will cut exactly on your lines so be sure to take your time and trace the parts carefully. You might consider using a ruler or a strait edge to help ensure accuracy.
 Step 4: Mail the tracing in. Be sure to print and fill out the Foam Request Sheet which will help speed up the process. Just include it with the tracing.
Shipping Address Below:
Case Club
Custom Foam Department
4765 E Bryson St
Anaheim CA, 92807
Step 5: Case Club’s turn. When we receive the tracing we will contact you with a quote and timeframe (usually about 5-9 days). After payment is worked out we will begin production immediately. If the case is one we carry we will add in our own perimeter which conforms perfectly to the case. If the insert is for something other than our case or you specify not to touch the perimeter, we won’t substitute anything. Lastly once we layout the parts in the case we may adjust their spacing if we feel it will help. (the overall layout will remain the same to maintain the same look), but perhaps the parts can be spread out a little to help protect everything a bit more.

